Craft How To Instructions
Quilling Instructions
Instructions

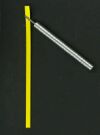
1. Hold the paper strip in one hand. In your other hand, hold the tool at an angle to your paper and slide the tool onto the paper strip.
2. With the tool at the top of the paper strip, start turning the tool toward you, curling the strip onto the tool (keep the fingers of your other hand over the curling paper strip to keep it straight and at an even tension). When you finish curling the strip, let it go and then carefully remove the quilled item from the tool.
See quilling shapes below.
See introduction to quilling video below.
Quilling Shapes
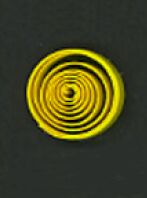
 Tight Circle -
Quill strip, glue closed while still on quilling tool. Remove from tool carefully.
|
 Loose Circle - Place a tiny amount of glue onto the very end (tail) on the inside of the quilled item to close it.
|
 Teardrop -
Make a loose circle; then pinch to a point between your fingers, forming a teardrop.
|
 Marquise (eye) -
Make a loose circle; then pinch both ends to a point between your fingers, forming a marquise.
|
 Broken Heart (arrow) -
Make a teardrop. On the end opposite of the point, push your fingernail inward to form the heart.
|
 V-Scroll -
Load your quilling tool and quill halfway down the strip to the outside. Remove tool and turn the strip over. Quill the other end, quilling outward.
|
 T-Scroll -
Make a v-scroll and glue the inside legs together.
|
 C-Scroll -
Load your quilling tool and quill halfway down the strip. Remove tool and repeat the same to the other end, forming a c-scroll.
|
 S-Scroll -
Load your quilling tool and quill halfway down the strip. Remove tool and turn the strip over. Continue to quill the other end, going in the opposite direction.
|
 Heart Scroll -
Same as a v-scroll except you are quilling inward.
|


